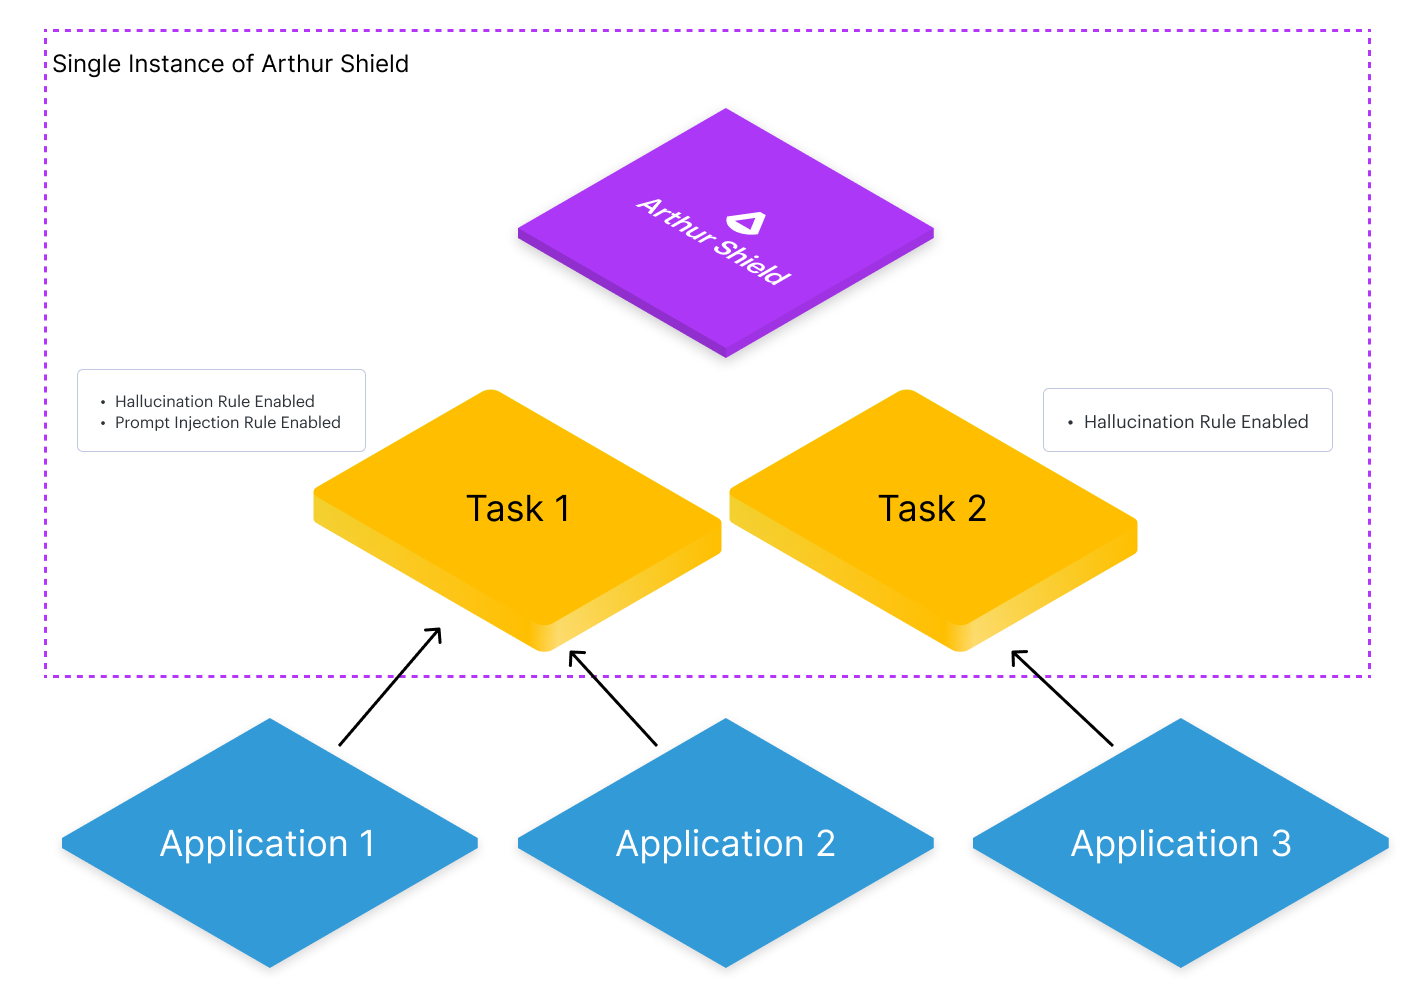
Managing multiple applications in Arthur Shield
Tasks in Arthur Shield represent conceptual use cases. You can isolate an application or set of applications by grouping them under separate tasks.

Step 1: Create Tasks in Arthur Shield
Create a Task for each use case or set of use cases that you want to isolate.
{
  "name": "Example Task Name"
}
Hold on to the id returned in the ResponseBody by this endpoint, it will be necessary for the upcoming steps.
Step 2: Configure rules for each Task as needed
Arthur Shield is deployed with no rules enabled, teams receive value from deciding which rules to enable and customizing those rules for their organization and specific use cases.
Step 2a: Configure default rules to be applied to all Tasks
Default Rules exist globally within an instance of Arthur Shield. Default rules are applied universally across existing Tasks and any subsequently created new Tasks. Please the reference the Rule Configuration Guide for more information on how to create default rules.
Step 2b: Configure Task specific rules as needed
Task Rules only apply to a single Task. When you Create a Task, all existing default rules will be auto-applied for this new Task. You can see which rules have been auto-applied in the rules ResponseBody field when you create a task.
{
  "id": "f29c9876-4528-425e-934d-eca2c9633a18",
  "name": "Example Task Name",
  "created_at": "2023-08-24T14:15:22Z",
  "updated_at": "2023-08-24T14:15:22Z",
  "rules": [
    {
      "id": "9719a514-d9eb-4113-9b6c-48499145b293",
      "name": "Example Rule",
      "type": "KeywordRule",
      "apply_to_prompt": true,
      "apply_to_response": true,
      "enabled": true,
      "created_at": "2023-08-24T14:15:22Z",
      "updated_at": "2023-08-24T14:15:22Z",
      "config": {
        "regex": "\\d{3}-\\d{2}-\\d{4}"
      }
    }
  ]
}
Once a Task is created, you can create a rule to be applied only to this Task. You can also enable or disable any rule for a given Task as needed. Please the reference the Rule Configuration Guide for more information.
Step 3: Maintain a mapping of Tasks to your use cases
Once you have set up Tasks and rules as desired, you are ready to start using Arthur Shield across your applications. In order to do so, you will need to maintain a mapping of which application or use case belongs to which task_id.
Step 4: Route requests to their respective Task endpoints
As explained in the Quickstart Guide, each application can validate prompts before they are routed to your LLM using the validate_prompt endpoint. To specify which task the request belongs to, you can specify the task_id in the url path:
POST {hostname}/api/v2/task/{task_id}/validate_prompt
For more information, please reference Step 2 in our quickstart guide.
Similarly, you can validate responses after they are generated by the LLM using the validate_response endpoint. To specify which task the request belongs to, you can specify the task_id in the url path:
POST {hostname}/api/v2/tasks/{task_id}/validate_response/{inference_id}
For more information, please reference Step 4 in our quickstart guide.
Updated 3 months ago
